Healthy Homemade Fruit Snacks With Sneaky Veggies
Healthy homemade fruit snacks with veggies are about to become your new obsession! Forget those brightly colored, artificially flavored store-bought pouches that leave you feeling a little guilty. We’re talking about creating vibrant, delicious, and genuinely good-for-you treats right in your own kitchen. Imagine biting into a burst of natural sweetness, knowing that you’re packing in extra nutrients without even trying. That’s the magic of these healthy homemade fruit snacks with veggies. They’re perfect for a quick energy boost, a delightful lunchbox addition for the kids (or yourself!), or even a guilt-free dessert. What makes them truly special is the incredible versatility – you can tailor the flavors and textures to your heart’s content, sneaking in a hidden dose of goodness that everyone will devour without a second thought.
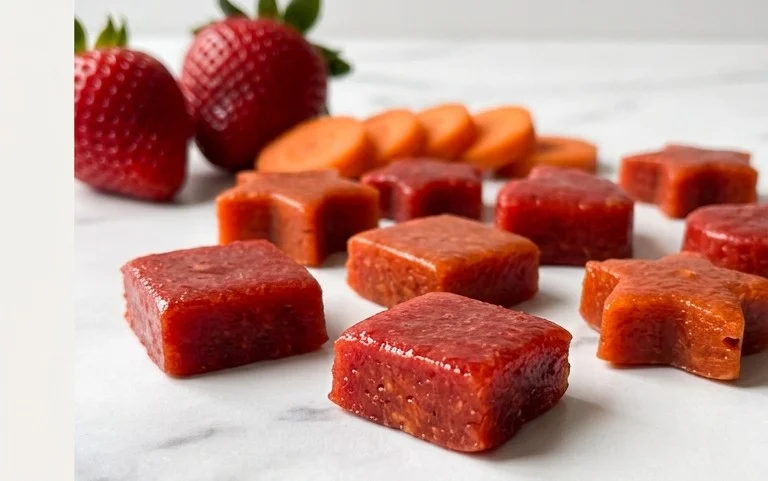
Healthy Homemade Fruit Snacks (with veggies!)
Tired of those brightly colored, artificially flavored fruit snacks that are loaded with sugar and questionable ingredients? I know I was! That’s why I set out to create a healthier, homemade version that my whole family can enjoy. And guess what? I managed to sneak in some sneaky veggies to boost the nutrition even further. These homemade fruit snacks are vibrant, delicious, and surprisingly easy to make. They’re perfect for lunchboxes, after-school treats, or even a little pick-me-up when you need something sweet. Plus, the satisfaction of knowing exactly what’s going into them is priceless.
The beauty of these snacks is their versatility. You can play around with different fruits and even experiment with other steamed vegetables like sweet potato or pumpkin. The gelatin provides a wonderful texture and is fantastic for gut health and joint support, making these more than just a treat. Let’s get started on creating these vibrant, nutrient-packed delights!
Ingredients:
- 1 1/2 cups diced mango chunks, defrosted if frozen
- 1 medium carrot, steamed until soft
- 2 tablespoons of honey*
- 1/4 cup water
- 5 tablespoons grass-fed beef gelatin powder
- 2 cups halved strawberries
- 1 small beet, steamed until soft
- 2 tablespoons of honey*
- 1/4 cup water
- 5 tablespoons grass-fed beef gelatin powder
*Note: For a vegan option, you can substitute the honey with maple syrup or agave nectar. Ensure the sweetener you choose is one you enjoy the flavor of, as it will influence the final taste of your snacks.
The Process: Crafting Vibrant Flavors
We’re essentially creating two different batches to maximize flavor and color, and then combining them for a beautiful visual appeal and a complex taste. This two-batch method ensures that each fruit and vegetable’s flavor profile shines through without overpowering the other.
Batch 1: Sunshine Mango-Carrot Delight
1. Prepare Your Fruit and Vegetable Base: Start with your 1 1/2 cups of diced mango chunks. If you’re using frozen mango, make sure it’s fully defrosted and any excess water has been drained. Next, take your steamed carrot. It’s crucial that the carrot is very soft, almost mushy. This will ensure it blends smoothly and doesn’t leave any fibrous bits in your final snack. You can steam carrots by boiling them until fork-tender or using a steamer basket over boiling water.
2. Blend the Flavors: In a blender or food processor, combine the diced mango and the softened steamed carrot. Add the 2 tablespoons of honey and the 1/4 cup of water. Blend these ingredients together until you achieve a completely smooth puree. You shouldn’t see any visible chunks of carrot or mango. If your blender is struggling, you can add another tablespoon of water at a time, but be careful not to make the mixture too watery, as this can affect the final texture of your gummies.
3. Bloom and Dissolve the Gelatin: In a small bowl, sprinkle the 5 tablespoons of grass-fed beef gelatin powder evenly over the remaining 1/4 cup of water (this water is separate from the water in the blender). Let it sit undisturbed for about 5-10 minutes. This process is called “blooming” and it allows the gelatin to hydrate and absorb the water, preventing clumps later on. Once bloomed, you’ll notice it has a thick, jelly-like consistency. You can gently warm this bloomed gelatin mixture over low heat (in a double boiler or very carefully in the microwave in 10-second intervals) until it’s completely dissolved and clear, with no grainy texture remaining. Be extremely careful not to overheat it, as this can degrade the gelatin’s gelling properties.
4. Combine and Mix Thoroughly: Pour the dissolved gelatin mixture into the blender with the mango and carrot puree. Blend again for another minute, ensuring everything is thoroughly combined. You want a uniform mixture.
Batch 2: Berry-Beet Burst
1. Prepare Your Fruit and Vegetable Base: Now for our second batch. Take your 2 cups of halved strawberries. Ensure they are washed and hulled. Next, add your steamed beet. Similar to the carrot, the beet needs to be very soft and easily mashable to ensure a smooth blend. Steam it until it’s tender enough to pierce easily with a fork.
2. Blend the Flavors: Add the halved strawberries and the softened steamed beet to your blender or food processor. Incorporate the remaining 2 tablespoons of honey and the final 1/4 cup of water. Blend until you have a smooth, vibrant puree. The beet will impart a beautiful deep red color.
3. Bloom and Dissolve the Gelatin (Again!): Repeat the blooming process for the remaining 5 tablespoons of grass-fed beef gelatin powder with the final 1/4 cup of water. Bloom it for 5-10 minutes, then gently warm it until it’s completely dissolved and clear, taking care not to overheat.
4. Combine and Mix Thoroughly: Add the dissolved gelatin mixture to the strawberry and beet puree in the blender. Blend for another minute to ensure everything is well incorporated.
Pouring and Setting Your Fruity Creations
Now that we have our two gorgeous, pureed mixtures, it’s time to bring them together.
1. Pouring the Layers: Take a silicone mold of your choice (gummy bear molds, small square molds, or even a small glass baking dish lined with parchment paper work well). You can pour each flavor in alternating layers, or you can gently swirl them together in the mold for a marbled effect. For distinct layers, pour about half of one color, then gently pour half of the other color on top. You can repeat this for a third layer if you have enough mixture. If you’re using a baking dish, you can pour one color, let it set slightly in the fridge for about 15-20 minutes, then pour the second color on top for distinct layers. This helps prevent the colors from bleeding too much if you want clear separation.
2. The Waiting Game (Setting Time): Once your molds are filled, carefully transfer them to the refrigerator. Allow them to set completely, which usually takes at least 2-4 hours, or until they are firm to the touch and no longer sticky. For best results and a firmer texture, I often leave mine in the fridge overnight. The chilling time is crucial for the gelatin to fully set and create that desirable gummy texture.
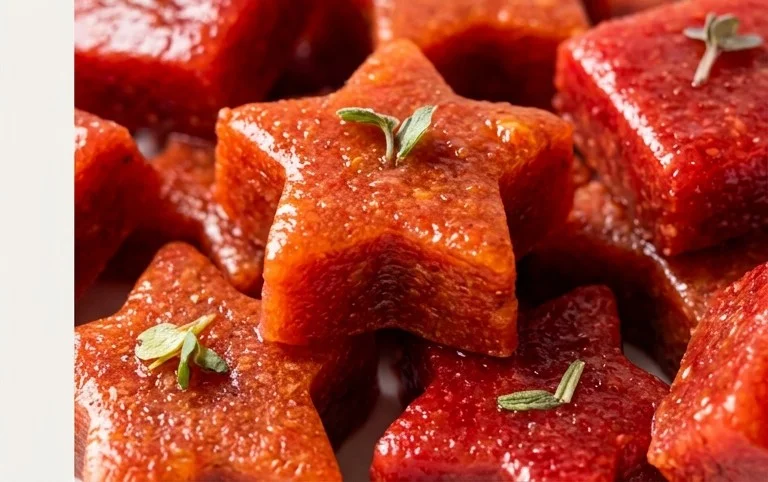
3. Demolding and Enjoying: Once set, carefully pop your homemade fruit snacks out of their molds. If you used a baking dish, cut them into bite-sized squares or fun shapes using a knife or cookie cutters. Store your finished fruit snacks in an airtight container in the refrigerator. They should last for about a week to 10 days. Enjoy your healthy, homemade goodness!
Conclusion:
So there you have it – a simple yet incredibly rewarding way to create delicious and healthy homemade fruit snacks that even sneak in a dose of veggies! What I love most about this recipe is its versatility and the satisfaction of knowing exactly what goes into each bite, free from artificial colors, flavors, and excessive sugar often found in store-bought options. These little gems are perfect for a quick breakfast boost, a post-workout refuel, or a guilt-free afternoon treat for the whole family. Don’t be afraid to get creative with your fruit and vegetable combinations – think berries with spinach, mango with carrot, or apple with zucchini. This recipe is a fantastic starting point for making healthier choices fun and accessible.
I truly encourage you to give these healthy homemade fruit snacks a try. They’re not only good for you but also incredibly tasty, making them a win-win for everyone. Experiment with different flavors and textures, and discover your new favorite snack!
Frequently Asked Questions:
Can I make these fruit snacks ahead of time?
Absolutely! These healthy homemade fruit snacks are perfect for meal prepping. Once they’ve set and are completely cool, you can store them in an airtight container in the refrigerator for up to a week. They might stick together slightly, so just give them a gentle separate before enjoying.
What are some good vegetable additions for these fruit snacks?
The possibilities are quite broad! Besides the ones mentioned in the recipe, consider adding steamed and pureed cauliflower (it’s surprisingly neutral!), sweet potato, or even a small amount of cooked beet for a vibrant color and subtle sweetness. Always start with small amounts to ensure the flavor profile remains pleasant.
My fruit snacks aren’t firming up properly. What could be wrong?
This usually comes down to the ratio of liquid to gelling agent (like gelatin or agar-agar). Ensure you’re measuring accurately. It’s also crucial to allow them to chill undisturbed for the recommended time in the refrigerator. Sometimes, depending on the natural water content of your fruits, you might need to slightly adjust the amount of gelling agent in future batches.
Healthy Homemade Fruit Snacks (with veggies!)
Delicious and healthy homemade fruit snacks packed with vitamins and nutrients from fruits and vegetables. Easy to make and a great alternative to store-bought snacks.
Ingredients
-
1 1/2 cups diced mango chunks, defrosted if frozen
-
1 medium carrot, steamed until soft
-
2 tablespoons of honey
-
1/4 cup water
-
5 tablespoons grass-fed beef gelatin powder
-
2 cups halved strawberries
-
1 small beet, steamed until soft
-
2 tablespoons of honey
-
1/4 cup water
-
5 tablespoons grass-fed beef gelatin powder
Instructions
-
Step 1
Combine mango chunks, steamed carrot, 2 tablespoons honey, and 1/4 cup water in a blender. Blend until completely smooth. -
Step 2
In a separate bowl, sprinkle 5 tablespoons of grass-fed beef gelatin powder over 1/4 cup of cold water. Let it bloom for 5-10 minutes. -
Step 3
Gently heat the bloomed gelatin mixture over low heat (or in the microwave for short bursts), stirring constantly, until it is fully dissolved and liquid. Do not boil. -
Step 4
Add the dissolved gelatin to the blender with the fruit and vegetable puree. Blend again until thoroughly combined. -
Step 5
Pour the mixture into a shallow pan or silicone molds. -
Step 6
Refrigerate for at least 2-3 hours, or until firm. Once set, cut into desired shapes or pop out of molds.
Important Information
Nutrition Facts (Per Serving)
It is important to consider this information as approximate and not to use it as definitive health advice.
Allergy Information
Please check ingredients for potential allergens and consult a health professional if in doubt.