Easy Chocolate Peanut Butter No Bake Cookies
The irresistible allure of a Chocolate Peanut Butter No Bake Cookie Recipe is undeniable. Who can resist that classic combination of rich, decadent chocolate swirled with creamy, salty peanut butter? It’s a flavor pairing that has captured hearts (and taste buds!) for generations, evoking feelings of nostalgia and pure comfort. What makes this particular Chocolate Peanut Butter No Bake Cookie Recipe so special? It’s the sheer simplicity and the promise of instant gratification. No oven preheating, no lengthy baking times, just a few minutes of stirring and a short chill before you’re rewarded with perfectly chewy, satisfying cookies. These treats are a lifesaver for busy weeknights, spontaneous dessert cravings, or when you simply don’t want to turn on the oven. Get ready to experience a little bit of magic in every bite of these delightful no-bake wonders.
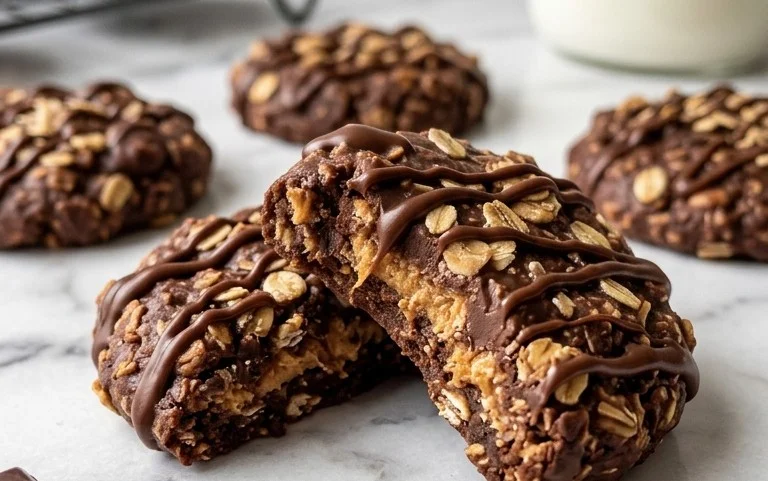
Chocolate Peanut Butter No Bake Cookie Recipe
Oh, the joy of a no-bake cookie! These chocolate peanut butter delights are a childhood favorite for so many, and for good reason. They’re incredibly easy to make, require no oven time (perfect for those hot summer days or when your oven is already occupied), and deliver an irresistible combination of rich chocolate and creamy peanut butter. They’re the kind of cookie that disappears from the plate in mere minutes, leaving everyone craving just one more. I love making these when I need a quick sweet treat or when the kids want to help in the kitchen. The process is straightforward and forgiving, making it an excellent recipe for bakers of all skill levels. Let’s dive into how to create these little bites of heaven.
Ingredients:
- 3 cups quick cook oats
- ¼ teaspoon salt
- ½ cup butter, (unsalted)
- 1 ⅔ cups sugar
- ½ cup milk
- ¼ cup cocoa powder
- 1 cup peanut butter
- 2 teaspoons vanilla extract
Cooking Instructions:
Phase 1: The Chocolatey Base
The magic of these no-bake cookies starts on the stovetop. Grab a medium-sized saucepan. This is where we’ll build the delicious chocolatey foundation that coats our oats and peanut butter. Add the unsalted butter, sugar, milk, and cocoa powder to the saucepan. This might seem like a lot of sugar, but it’s crucial for achieving the right texture and sweetness in these cookies. The cocoa powder is what gives them their classic chocolatey flavor, so be sure to use a good quality one for the best taste.
Place the saucepan over medium heat. Now, this is where you need to be a little patient and attentive. Stir the mixture constantly with a whisk or a wooden spoon. You want to ensure the butter melts completely and that the sugar dissolves. Keep stirring until the mixture comes to a rolling boil. A rolling boil means it’s bubbling vigorously and doesn’t stop when you stir it. Once it reaches this point, you’re going to let it boil for exactly one minute. This minute is critical! It allows the sugar to properly dissolve and the flavors to meld. Timing is important here, so set a timer to make sure you get that precise one-minute boil. If you boil it for too short a time, your cookies might be too soft and crumbly. Boil it for too long, and they could become hard and brittle. So, one minute of a rolling boil, stirring constantly, is your goal.
Phase 2: Infusing the Peanut Butter Goodness
Once the one-minute boil is complete, immediately remove the saucepan from the heat. This stops the cooking process and prevents the mixture from burning. Now, add in the peanut butter and the vanilla extract. The heat from the chocolate mixture will easily melt the peanut butter, making it smooth and easy to incorporate. Stir vigorously until the peanut butter is completely melted and fully combined with the chocolate mixture, creating a smooth, glossy, and incredibly fragrant sauce. The aroma at this stage is just heavenly! Make sure there are no streaks of peanut butter left. The vanilla extract adds that extra depth of flavor that really rounds out the chocolate and peanut butter combination.
Phase 3: Bringing it All Together
Now for the fun part – adding the dry ingredients! In a large bowl, combine the quick cook oats and the salt. The quick cook oats are essential here because they absorb the liquid mixture more readily and cook faster than traditional rolled oats, which is key for no-bake cookies. The salt, even though it’s a small amount, plays a vital role in balancing the sweetness and enhancing the chocolate and peanut butter flavors. Give the oats and salt a quick stir to distribute the salt evenly.
Next, pour the hot chocolate peanut butter mixture over the oats and salt in the large bowl. This is where the transformation happens! Using a sturdy spoon or a silicone spatula, stir everything together thoroughly. You want to make sure that every single oat is coated in the glorious chocolate peanut butter mixture. This might take a minute or two of vigorous stirring, especially as the mixture starts to cool and thicken. It’s important to get a good coating on all the oats, as this is what will bind the cookies together and give them their structure. Don’t rush this step; a well-coated oat is a happy oat, and a happy oat makes a delicious cookie!
Phase 4: Forming the Cookies
Once the oats are completely coated and the mixture is well combined, it’s time to shape our cookies. You’ll want to work fairly quickly because the mixture will start to set up as it cools. Prepare a baking sheet or a large platter by lining it with parchment paper or wax paper. This prevents the cookies from sticking and makes cleanup a breeze. Using two spoons or a small cookie scoop, drop rounded tablespoons of the cookie mixture onto the prepared baking sheet. You can also lightly press them down with the back of your spoon to create a slightly flatter cookie, or leave them as little mounds for a more rustic look. Try to make them all roughly the same size so they bake (or rather, set) evenly.
Let the cookies sit undisturbed on the baking sheet for about 30 minutes to an hour at room temperature, or until they are firm to the touch. You can speed up this process by placing the baking sheet in the refrigerator for about 15-20 minutes. Once they’ve set up and are firm, they are ready to be enjoyed! Store any leftovers in an airtight container at room temperature for a few days, or in the refrigerator if you prefer them to be extra firm and cool. These cookies are a fantastic treat for parties, potlucks, or just a simple craving. Enjoy the delightful taste of chocolate and peanut butter in every bite!
Conclusion:
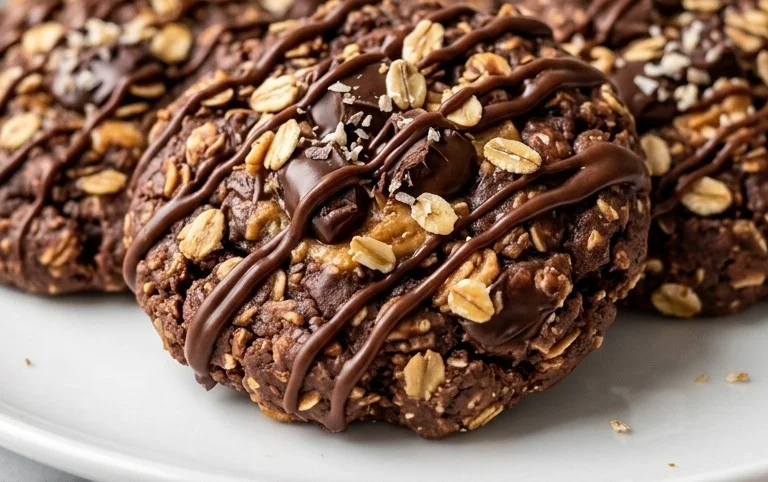
And there you have it – your guide to creating incredibly delicious Chocolate Peanut Butter No Bake Cookies! I truly hope you’ll give this recipe a try. What makes these cookies so fantastic is their sheer simplicity and the irresistible combination of rich chocolate and creamy peanut butter. They’re the perfect treat when you’re craving something sweet without the fuss of preheating an oven. Whether you’re a seasoned baker or a complete beginner, these no-bake wonders are incredibly forgiving and yield fantastic results every time.
These delightful cookies are wonderfully versatile. Enjoy them on their own as a satisfying snack, serve them at parties, pack them for lunches, or even crumble them over ice cream for an extra special dessert. For a touch of creativity, consider adding a sprinkle of sea salt on top before they set for a lovely sweet and salty contrast, or mix in some mini chocolate chips for an even more intense chocolate flavor. The possibilities are truly endless when it comes to customizing your perfect Chocolate Peanut Butter No Bake Cookie!
Don’t hesitate to experiment and make them your own. I’m confident you’ll fall in love with how easy and rewarding this recipe is. Happy baking – or rather, happy no-baking!
Frequently Asked Questions:
Q: Can I make these cookies nut-free?
A: While the classic flavor relies on peanut butter, you can certainly adapt this recipe. Try using sunflower seed butter or a nut-free butter alternative. The texture might be slightly different, but you’ll still achieve a delicious cookie!
Q: How should I store these Chocolate Peanut Butter No Bake Cookies?
A: These cookies are best stored in an airtight container at room temperature for up to 3-4 days. If it’s particularly warm where you live, or you want them to last longer, storing them in the refrigerator is a great option. They’ll firm up nicely!
Q: My cookies are too soft. What did I do wrong?
A: This can happen if the mixture wasn’t cooked for quite long enough, or if the weather is very humid. Ensure you bring the mixture to a full boil for at least one minute as instructed. Allowing them to cool undisturbed on parchment paper for the recommended time is also crucial for them to set properly.
Chocolate Peanut Butter No Bake Cookies
Easy and delicious no-bake cookies combining classic chocolate and peanut butter flavors with chewy oats.
Ingredients
-
3 cups quick cook oats
-
1/4 teaspoon salt
-
1/2 cup unsalted butter
-
1 2/3 cups sugar
-
1/2 cup milk
-
1/4 cup cocoa powder
-
1 cup peanut butter
-
2 teaspoons vanilla extract
Instructions
-
Step 1
In a medium bowl, combine the quick cook oats and salt. Set aside. -
Step 2
In a saucepan over medium heat, melt the butter. Add the sugar, milk, and cocoa powder. Bring the mixture to a boil, stirring constantly. -
Step 3
Boil the mixture for exactly 1 minute, stirring continuously. Remove from heat. -
Step 4
Stir in the peanut butter and vanilla extract until smooth. The mixture will be thick. -
Step 5
Quickly add the oat mixture to the peanut butter and chocolate mixture. Stir until well combined and all oats are coated. -
Step 6
Drop spoonfuls of the cookie mixture onto wax paper-lined baking sheets. Allow to cool and set for at least 30 minutes before serving.
Important Information
Nutrition Facts (Per Serving)
It is important to consider this information as approximate and not to use it as definitive health advice.
Allergy Information
Please check ingredients for potential allergens and consult a health professional if in doubt.