Fudgy Marshmallow Swirl Brownies-Decadent Bliss
Marshmallow brownies are the ultimate indulgence, a delightful symphony of textures and flavors that has captured the hearts of dessert lovers everywhere. There’s something undeniably magical about the classic brownie, that rich, fudgy chocolate goodness we all crave. But when you swirl in pockets of gooey, melted marshmallow, a transformation occurs, elevating them from delicious to downright divine. These aren’t just brownies; they’re an experience. The perfect balance of chewy brownie edges, a tender, molten center, and those irresistible, airy bursts of sweet marshmallow makes every bite an adventure. Whether you’re a seasoned baker or just starting out, these marshmallow brownies are sure to become a go-to recipe for any occasion that calls for a little extra comfort and a whole lot of chocolatey bliss.
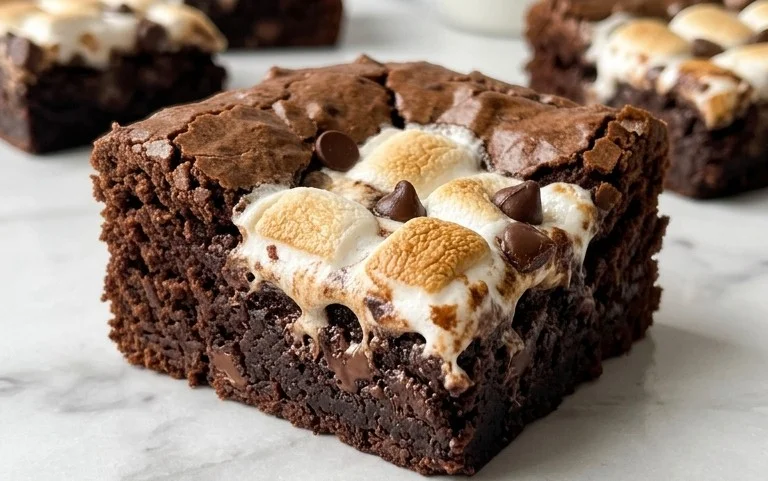
Marshmallow Brownies
Get ready to embark on a journey to brownie bliss! Today, we’re diving into the decadent world of Marshmallow Brownies. These aren’t just any brownies; they’re a symphony of rich chocolate, fudgy texture, and that irresistible gooey, marshmallowy swirl that elevates them from ordinary to extraordinary. Imagine biting into a perfectly baked brownie, where the intense cocoa flavor is beautifully complemented by pockets of molten marshmallow. It’s a dessert that promises pure indulgence and is surprisingly straightforward to make. Whether you’re a seasoned baker or a beginner looking to impress, these Marshmallow Brownies are sure to become a cherished recipe in your repertoire. Let’s get started and create some magic in the kitchen!
Ingredients:
- 2 cups White granulated sugar
- 3 Large eggs
- 1 Egg yolk
- 1/2 cup Unsalted butter (melted)
- 2 tsp Pure vanilla extract
- 1/2 cup Oil (canola or vegetable)
- 3/4 cup All-purpose flour
- 1 cup Unsweetened cocoa powder (Use dutch process cocoa powder for a richer, deeper flavor)
- 1 1/2 TBSP Cornstarch
- 1/2 tsp Salt
- 1 cup Semi-sweet chocolate chips
- 1 cup Marshmallow creme
Instructions:
Step 1: Preparing the Brownie Batter Base
Start by preheating your oven to 350°F (175°C). Grease and flour a 9×13 inch baking pan. This is crucial for ensuring your brownies release cleanly from the pan and don’t stick. You can also line it with parchment paper, leaving an overhang on the sides, which makes lifting the finished brownies out even easier. In a large bowl, combine the 2 cups of granulated sugar with the 3 large eggs and the single egg yolk. Whisk these together vigorously until the mixture becomes pale yellow and slightly thickened. This process, known as “ribboning,” incorporates air into the batter, contributing to a fudgier texture. Don’t rush this step; it’s a foundational element for great brownies. Next, gently whisk in the 1/2 cup of melted unsalted butter and the 2 teaspoons of pure vanilla extract. The vanilla extract is key to enhancing the chocolate flavor and adding a subtle aromatic depth. Then, incorporate the 1/2 cup of oil. The oil contributes to the moistness and fudgy consistency of the brownies, ensuring they don’t dry out.
Step 2: Incorporating the Dry Ingredients
Now it’s time to introduce the dry ingredients. In a separate medium bowl, whisk together the 3/4 cup of all-purpose flour, the 1 cup of unsweetened cocoa powder, 1 1/2 tablespoons of cornstarch, and 1/2 teaspoon of salt. Using dutch process cocoa powder will yield a darker, more intense chocolate flavor with a smoother taste, which is ideal for these decadent brownies. The cornstarch acts as a binder and helps to create that desirable fudgy texture. Whisk these dry ingredients thoroughly to ensure they are well combined and there are no clumps of cocoa powder. This also helps to distribute the salt evenly, which balances the sweetness and amplifies the chocolate flavor. Gradually add the dry ingredients to the wet ingredients, mixing until just combined. Be careful not to overmix the batter at this stage. Overmixing can develop the gluten in the flour too much, leading to tougher brownies. A few streaks of flour are perfectly fine; they will disappear as you continue to fold in the chocolate chips.
Step 3: Folding in the Chocolate Chips and Preparing for the Marshmallow Swirl
Gently fold in the 1 cup of semi-sweet chocolate chips into the brownie batter. These chocolate chips will melt slightly during baking, creating delightful pockets of gooey chocolate within the fudgy brownie. Ensure they are evenly distributed throughout the batter. Once the chocolate chips are incorporated, pour about two-thirds of the brownie batter into your prepared baking pan and spread it evenly. Now comes the magic of the marshmallow swirl. Spoon dollops of the 1 cup of marshmallow creme over the brownie batter in the pan. Don’t worry about making it perfect; the uneven distribution is what creates beautiful swirls.
Step 4: Creating the Marshmallow Swirl and Baking
Using a knife or a skewer, gently swirl the marshmallow creme into the brownie batter. Be artistic with it! You want ribbons of marshmallow weaving through the chocolate. Be careful not to over-swirl, as you don’t want the marshmallow to completely disappear into the batter. Now, carefully spoon the remaining one-third of the brownie batter over the marshmallow creme. Gently spread this top layer of batter to cover the marshmallow as much as possible. This will help to create a beautiful marbled effect once baked. Place the pan in the preheated oven.
Step 5: Baking to Perfection and Cooling
Bake the Marshmallow Brownies for approximately 30-35 minutes. The baking time can vary depending on your oven. You’ll know they’re ready when the edges are set and a toothpick inserted into the center (avoiding a marshmallow pocket) comes out with moist crumbs attached, not wet batter. It’s better to slightly underbake than overbake for the fudgiest results. Once baked, remove the pan from the oven and let the brownies cool completely in the pan on a wire rack. This cooling process is essential. As they cool, they will continue to set and develop that perfect fudgy texture. Rushing this step can result in brownies that are too soft and may fall apart. Once completely cool, lift the brownies out of the pan using the parchment paper overhang (if used) and cut them into squares. Enjoy these incredibly rich and gooey Marshmallow Brownies!
Conclusion:
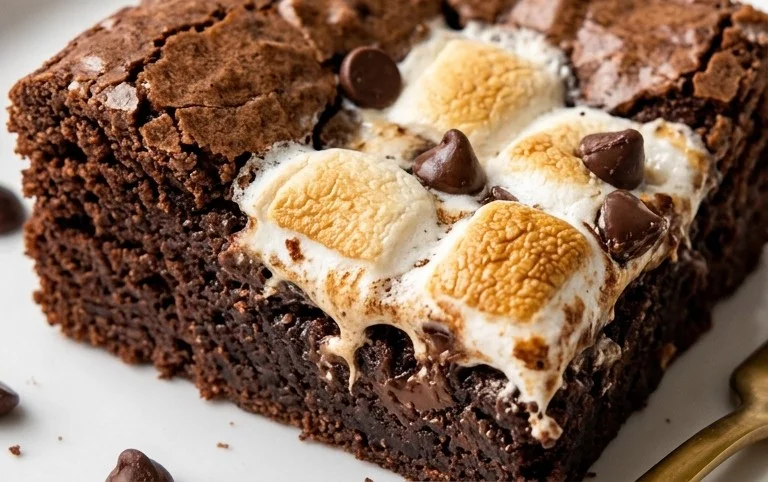
These Marshmallow Brownies are an absolute dream for any chocolate and marshmallow lover! The combination of rich, fudgy brownie batter with gooey, melted marshmallows creates a dessert that is simply irresistible. The contrast in textures – the dense, slightly chewy brownie base against the airy, sweet marshmallow topping – is truly delightful. They’re perfect for potlucks, family gatherings, or simply a special treat to brighten your day. I’ve found they’re fantastic served warm, allowing the marshmallows to be extra gooey, but they’re also surprisingly delicious at room temperature, making them a great make-ahead option.
For serving, I love to accompany these Marshmallow Brownies with a scoop of vanilla ice cream, or even a drizzle of caramel sauce. If you’re feeling adventurous, consider adding a sprinkle of sea salt on top before baking to enhance the chocolate flavor, or swirl in some peanut butter for a decadent twist. Don’t be afraid to experiment with different types of chocolate chips too – milk, dark, or white chocolate all work wonderfully! I truly hope you give this recipe a try; I promise you won’t be disappointed by this sensational marshmallow brownie creation!
Frequently Asked Questions:
Can I make these Marshmallow Brownies ahead of time?
Absolutely! These are fantastic made a day in advance. Once cooled completely, store them in an airtight container at room temperature. They might even be even better the next day as the flavors meld together.
What kind of marshmallows work best?
While regular large marshmallows work perfectly, you can also use mini marshmallows for a more even distribution of gooeyness. Some people even love to use marshmallow creme swirled into the batter or spread on top. The key is to have plenty of marshmallow goodness!
My marshmallows are browning too quickly, what can I do?
If your marshmallows are browning faster than you’d like, you can loosely tent the pan with aluminum foil during the last 5-10 minutes of baking. This will help them melt and become gooey without burning the tops.
Marshmallow Brownies
Rich and fudgy brownies swirled with a gooey marshmallow layer, creating a decadent treat with a delightful texture contrast.
Ingredients
-
2 cups White granulated sugar
-
3 Large eggs
-
1 Egg yolk
-
1/2 cup Unsalted butter (melted)
-
2 tsp Pure vanilla extract
-
1/2 cup Oil (canola or vegetable)
-
3/4 cup All-purpose flour
-
1 cup Unsweetened cocoa powder (Use dutch process cocoa powder)
-
1 1/2 TBSP Cornstarch
-
1/2 tsp Salt
-
1 cup Semi-sweet chocolate chips
-
1 cup Marshmallow creme
Instructions
-
Step 1
Preheat oven to 350°F (175°C). Grease and flour a 9×13 inch baking pan. -
Step 2
In a large bowl, whisk together sugar, eggs, and egg yolk until well combined. -
Step 3
Stir in melted butter, vanilla extract, and oil until smooth. -
Step 4
In a separate bowl, whisk together flour, cocoa powder, cornstarch, and salt. Gradually add dry ingredients to wet ingredients, mixing until just combined. Fold in chocolate chips. -
Step 5
Spread half of the brownie batter into the prepared pan. Dollop the marshmallow creme evenly over the batter, then spread the remaining brownie batter on top, covering the marshmallow layer. -
Step 6
Bake for 30-35 minutes, or until a toothpick inserted into the center comes out with moist crumbs. Be careful not to overbake. -
Step 7
Let cool completely in the pan before cutting into squares.
Important Information
Nutrition Facts (Per Serving)
It is important to consider this information as approximate and not to use it as definitive health advice.
Allergy Information
Please check ingredients for potential allergens and consult a health professional if in doubt.